Get Everything You Need

Kendari 75'' Extra Wide TV Stand for TVs up to 95"
$699.99
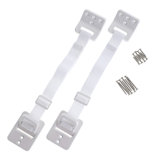
Wayfair Basics® Hinged Furniture Anti-Tip Strap
$15.99
Buy Both: $715.98
Rated 4.5 out of 5 stars.
AI-generated from customer reviews
Showing 1-10 of 211 reviews
Rated 5 out of 5 stars.
As pictured. It looks very nice after putting it together which took approximately 2 hours. Not too difficult to assemble if you’re handy but may take longer if not. The screws were a tad long and would have ruined the stand if my husband hadn’t trimmed them down. Satisfied overall.
Rated 5 out of 5 stars.
Bought this two years ago for my basement and it’s held up perfectly!
Rated 5 out of 5 stars.
Great looking stand. Does not look or feel cheap. Works perfectly for my 77” tv.
Rated 4 out of 5 stars.
Very nice
Rated 5 out of 5 stars.
It fits my 86” and I had to squeeze the metal pieces that were hooks for the glass cabinets, but other than that it looks beautiful. I love it.
Rated 5 out of 5 stars.
Great addition to the Man Cave!!!
Rated 2 out of 5 stars.
Arrived with plastic guard guide rail broken for glass doors . Trying to up load pics for customer service to replace.
Rated 5 out of 5 stars.
Fits our new 86” perfectly! Pretty easy assembly! Great Buy!
Rated 5 out of 5 stars.
The item would've been perfect but I received it damaged. Too much hassle to return it.
Rated 4 out of 5 stars.
I come bearing gifts. TLDR: If you’re on the fence, buy it. It is worth the price. It is NOT some hollow pressboard piece of garbage. It’s well constructed and looks great. More Detail + Gifts: To elaborate a bit further… As long as you’ve checked your measurements to make sure your TV stand is going to fit on it, this is an easy yes. It’s a little pricey, but you’re getting value here. This won’t be something that gets delivered and while you’re assembling it you’re thinking I can’t believe I paid so much for this trash. We’ve definitely purchased things like that off of Wayfair and this is definitely not one of them. We’re planning to put a rather large television on top of it and one of my chief concerns was just how solid is that top shelf. I inquired with customer service, but didn’t get the most reassuring answer. If you are also wondering let me put any questions you have to rest. That top shelf is VERY solid, VERY VERY solid. It is the heaviest piece in the box. I have zero concerns about putting the new TV on it now. Now, you’re hearing me say all these good things about it, but also probably see that I gave it 4 our of 5 stars. The 1 star deduction was for yet another set of instructions written by someone who never actually assembled the product. This is a major pet peeve of mine and to me it is shamefully stupid that companies who actually build a good product, can fall so short on something so simple as instructions. That all being said, IF you do buy this (which you totally should) please use the following info to reduce the cursing factor during your assembly. Otherwise, you might need to hide the kids when you’re putting this together. Tools: The instructions show a rubber mallet and a Phillips head screwdriver as the only tools you’ll need. Let me save you some trouble. First you need a real hammer, not a rubber mallet. If you need a rubber mallet to put this together, you’ve done something horribly wrong. Second, a Phillips or flat head screwdriver with a larger/thicker head is helpful for the larger screws labeled (C) and a smaller Phillips (and flat) head is helpful for the small posts labeled (H). (You’ll use the smaller flat head for something later.) Next, if you own a 5/32 Allen wrench, that would be helpful too. The one they send with the unit is fine, but as always it’s tiny. 5/32 may not be the precise size (it may metric that you need) but worked perfectly for me, no slips or anything. Instructions: 1. SKIP STEP 1. Do Step 1 AFTER Step 10. Otherwise, the little legs get in the way of installing the 4 corner screws in Step 10. It can still be done, but you’ll certainly be cursing someone in the process. 2. STEP 3. Screw the square pieces of plastic labeled as (K) onto the posts before you put the posts into the board. As you tighten the posts down the small squares are going to shift. Once the post is as tight as you want it, use that smaller flat head I told you to grab to put a slight bit of pressure on the edge of the plastic squares to nudge them back into proper alignment. One small side note here, I did two of these and let my wife do the other two. She could only get them screwed part way in before she needed me to finish them off. 3. STEP 5. Put the screws labeled C into the board labeled 5 and then put the plastic squares (K) onto the screws on the other side of the board. Only after doing this should you try to marry them up the posts on board 1. As you screw the screws into the posts, you can use your fingers to keep the squares from spinning out of alignment, just watch your fingers as you get to the end so you don’t pinch them. 4. STEP 7. Ignore this step. Turning the thing on the side to install the posts is idiotic. Keep the thing flat for the rest of the assembly. It will make your life much easier. 5 STEP 11. I really don’t know what the purpose of the wheels is, however, if you feel the need to put them on and have a drill handy, take my advice and do the following. Put a wheel on the unit where you want it (there are small indentations on the board where they should go) and then with the tiniest drill bit you have go through the hole in the wheelbase (and the completely misaligned rubber) and SHALLOWLY into the board. Do it on all 4 corners of the wheel. The reason this is helpful is two-fold. First, the rubber on the bottom of my wheels was so misaligned that the screws were going in all askew which was really unhelpful. Second, it will save your arm as you try to muscle the screws into the wood. DON’T just try to use the indentations as a map for where you should drill. The holes on the wheel WILL NOT line up if you do it this way. Again, it’s due to the rubber on the mount making the screws not line up straight. All in all assembly should take 60-90 minutes. I think it took me about an hour and forty-five minutes, but that was due to me sorting through some of the things listed above.
Kendari 75'' Extra Wide TV Stand for TVs up to 95"
$699.99
Wayfair Basics® Hinged Furniture Anti-Tip Strap
$15.99
Buy Both: $715.98

Sound Bar Shelf

Weight Capacity: 150 lb.

Assembly Required

Cable Management
About This Product
Features

Earn $35.00 in rewards, with 5% back¹, plus more exclusive perks
FREE Delivery
Get it Sat, Jul 12 - Mon, Jul 14
to
43215

