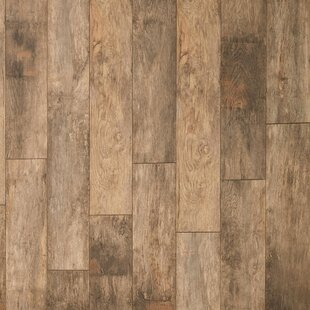
Mohawk Elite waterproof vinyl tile flooring offers beautiful designer wood and stone looks with worry-free performance. The product possesses a farmhouse feel in warm wheat toned brown. The premium LVT is designed to repel household spills and pet accidents, making it remarkably easy to clean. Ideal for any level and any room in your home, Elite can be installed even in high-traffic areas or damp spaces such as basements and bathrooms. Mohawk’s interlocking planks make installation a snap, and DIY-friendly built-in underlayment saves time on installation. Elite LVT includes a limited lifetime residential warranty and a 10-year limited light commercial warranty. Mohawk is a worldwide leader in flooring solutions. Committed to innovation, performance, and sustainability, many of Mohawk’s collections have changed the face of flooring. The brand is renowned for creating unique products that add style and value to any space
- Flooring Type: Vinyl plank
- Subject: Wood look
- Water Performance Level: Waterproof
- Wear Layer Thickness: 20Millimeters
- Mounting / Installation Type: Click-Lock
[This review was collected as part of a promotion.] Our guest room had old carpet, so we decided to install some vinyl flooring planks. We are normally do it yourselfers, so we figured we could install the flooring ourselves. We got five boxes which covers just over 140 square feet, and the room was 128 square feet, so we thought we'd have enough.
First we removed the trim, carpet, and padding, and cleaned up the entire floor thoroughly. So far, so good. Our floor is concrete and smooth, so we did not put the planks over any sort of liner.
We had watched some videos to get an idea of how to install the flooring. I would strongly recommend watching the videos. You have to click the planks into place, the short end first, then you have to click the planks the long way, which is the hard part. You really need two people to do this, especially if you're a beginner. It took us some practice to finally figure out how to do this. More than once we'd get a couple of rows in only to see that one of the planks a couple of rows back had popped loose. We then went to watch another video for help. Eventually we got the hang of it.
To make matters worse, we found that a couple of our boxes had damaged ends on almost every piece. We got creative on which ones we could use as cut end pieces. You have to be careful which end you cut because you need the locking end to lock with the other piece. After you get the planks clicked together, you have to tap the rows together with a special tool.
We did end up with enough planking and a beautiful floor despite our problems. It took us a good part of three days to get everything done though. Don't go into this thinking it's going to be a breeze unless you're a professional. And watch more than one video because you're going to need to really understand how to do this.. Kacey. Columbia SC. 2022-02-27 21:24:59